How to create a global event bus in NuxtJS
In this article, I’m going to show you how simple it is to add a global event bus to your Nuxt application! In essence, all we have to do is create a small plugin, and then register the plugin in our Nuxt configuration file. Let’s get started!
What is a global event bus?
Simply put, a global event bus is a way for us to both listen for and emit events anywhere in our application. They’re very convenient when a global store (Vuex, Redux, etc) is overkill, but you still want to pass around small bits of data, or listen for an event at any point. You can emit or listen for events from any component, regardless of where it is in your component tree. Handy!
Adding a global event bus in NuxtJS
The first thing we need to do is add a new plugin to our Nuxt application. Go ahead and create a file in the plugins folder called eventBus.js. Type or paste this code into your newly created plugin file.
import Vue from "vue";

export default (_ctx, inject) => {
  const bus = new Vue();
  inject("bus", bus);
};
There’s not much going on here, but let’s break it down anyway. You’ll notice we’re importing Vue, which might strike you as odd, but I’m going to talk a little more about that shortly.
The first thing we do is export a default function for the plugin to run. You’ll notice I prefixed ctx with an underscore, which is just a convention I like to use when argument order matters, but you don’t actually want to use it. The second parameter inject is what we really want so we include it as well.
Ok, on to the good stuff! On the first line of the function, we new up a barebones instance of Vue. Weird right? However, Vue instances actually provide us with all the capabilities we need for a global event bus, including $emit, and $on functions for emitting and listening for events respectively.
Next we call the inject() function, give it a name of bus, and pass in our empty Vue instance. inject is a function provided by Nuxt that allows us to attach objects and functions to the root Vue instance that Nuxt utilizes under the hood. Cool! We’re done in this file, but we still need to register the plugin for Nuxt to recognize it properly.
Whenever you inject an object into Nuxt, it automatically prefixes whatever
name you passed to inject with a $ sign. This is a
common convention when adding functions directly to Vue instances. Be aware of
this when you’re using it in your components!
Go ahead and open up your nuxt.config.js file, and add this entry into the plugins array:
{ src: '~/plugins/eventBus.js', ssr: true }Here we’re just passing a path to the plugin, and specifying that it is compatible with server-side rendering. We now have a fully working global event bus for our Nuxt application! 🎉
Practical example: A notification component
Let’s build a simple notification component to showcase the power of a global event bus. We’ll wire it up to listen for a specific event, and display itself for a few seconds when that event gets triggered from another component. If you’d like to inspect the end result, I’ve built a CodeSandbox for you to reference.
First we’ll create the actual Notification component. Go ahead and create a file called Notification.vue in your components directory. Inside that component, we’ll add some simple template code.
<template>
  <div v-show="isShowing" class="notification">
    <span>🔔</span>
    <span>{{ message }}</span>
  </div>
</template>
Next we’ll set up the component logic to listen for events from the global event bus, and when we receieve that event, we’ll show the notification for 3 seconds.
export default {
  data() {
    return {
      timer: null,
      isShowing: false,
    };
  },
  created() {
    this.$bus.$on("NOTIFICATION", (message) => {
      this.message = message;
      this.$nextTick(this.showNotification);
    });
  },
  methods: {
    showNotification() {
      this.isShowing = true;
      if (this.timer) clearTimeout(this.timer);
      this.timer = setTimeout(() => {
        this.isShowing = false;
      }, 3000);
    },
  },
};
Alright, let’s dissect this a bit. When the component’s created hook runs, we use the global event bus’s $on method to bind a listener that listens for incoming events called NOTIFICATION. In this case we can assume the event is also going to pass some kind of data — namely a message to display to the user. So in our callback function, we pass message in, and set our own message state to that value.
Once that’s done we call a showNotification message inside a $nextTick call. I’ve previously run into some odd race conditions while doing something similar without $nextTick, so I included it here, but feel free to use it at your own discretion!
The showNotification method is pretty straightforward — we set the isShowing state to true (which our template relies on for showing and hiding the notification in the DOM), and then uses a setTimeout call to set it back to false 3 seconds later.
For good measure we’ll add some really simple styles.
<style>
  .notification {
    background-color: #c6f6d5;
    border: 1px solid #276749;
    color: #276749;
    font-family: "Arial", sans-serif;
    position: fixed;
    bottom: 25px;
    right: 25px;
    width: 280px;
    z-index: 999;
    padding: 16px;
  }
</style>
Let’s open up pages/index.vue, delete everything inside of it, and add our Notification component to it.
<template>
<div>
<Notification />
</div>
</template>
<script>
import Notification from "~/components/Notification";
export default {
components: {
Notification,
},
};
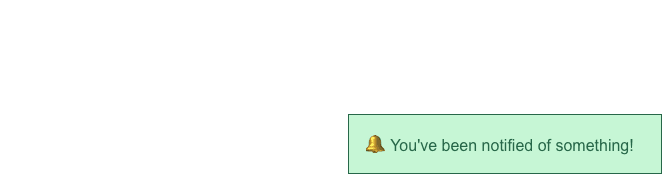
</script>When the notification is showing it will now look something like this:
Now let’s add a button somewhere else in our app to trigger the notification! We’ll create another component that contains a text field for setting your custom notification message, and a button to actually trigger it. Create a new file in your components directory called NotificationTrigger.vue. Go ahead and add this inside:
<template>
  <div>
    <input
      type="text"
      placeholder="Enter a notification message..."
      v-model="message"
    />
    <button @click="sendNotification">Send notification!</button>
  </div>
</template>
<script>
export default {
  data() {
    return {
      message: "",
    };
  },
  methods: {
    sendNotification() {
      this.$bus.$emit("NOTIFICATION", this.message);
    },
  },
};
</script>
Cool! Now let’s hop back into pages/index.vue and add this component right above the Notification component. The whole file should look like this now:
<template>
  <div>
    <NotificationTrigger />
    <Notification />
  </div>
</template>
<script>
import Notification from "~/components/Notification";
import NotificationTrigger from "~/components/NotificationTrigger";
export default {
  components: {
    Notification,
    NotificationTrigger,
  },
};
</script>
Fire up http://localhost:3000, enter some text in the textbox and hit the button. You should see a notification pop up with the text you entered, and it should disppear 3 seconds later. Great work! We’ve successfully created a practical use case for a global event bus. I’ve created a CodeSandbox you can check out, to see a live working example.
That’s all for now! If you have any questions or comments, feel free to ping me on Twitter, @syropian.